Showing posts with label Dry embossing. Show all posts

Thursday, June 7, 2012

Old school?

I have finally made a card! I decided to make something I haven't used in a long while....a stencil!


The silhouette is a digi. The stencil I used is Marianne Designs Emily 1. After embossing the stencil twice using a lightbox and embossing tool and cutting with a knife I used a clear Stardust Gelly Roll pen to go around the outer edges of the embossing and the lines of the veil on the hat. I don't know if this enhanced it or not but it is what it is LOL  Does anyone use this method of embossing anymore? It seems like we are all going to the cut and emboss dies. While there are many pretty ones out there what I don't like about them is that you get the outline of the die embossed onto your paper.

Monday, November 14, 2011

Crafts Too embossing folders

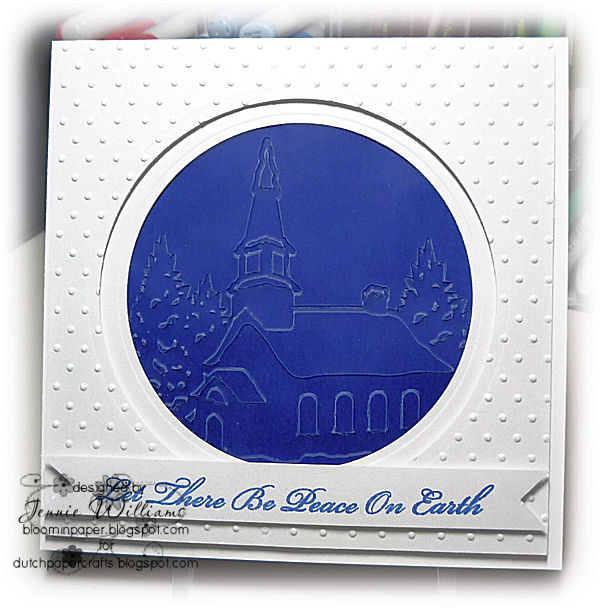
These are samples I made for Dutch Paper Crafts using embossing folders from Crafts Too which you can order HERE

 This is the Winter Village folder embossed on blue vellum.


This is the Christmas background folder using the de-bossed side.


For the Christmas Wreath I added glitter to some parts of the wreath.


This folder is called Pine Tree Scene.


For the Snowflake Banner folder I embossed on white core card stock and then did some sanding.

This is the Sleigh folder. The border is a Martha Stewart snowflake border punch and the sentiment is from Papertrey Ink Signature Christmas clear stamp set.


This is the pretty Snowflake Banner folder.


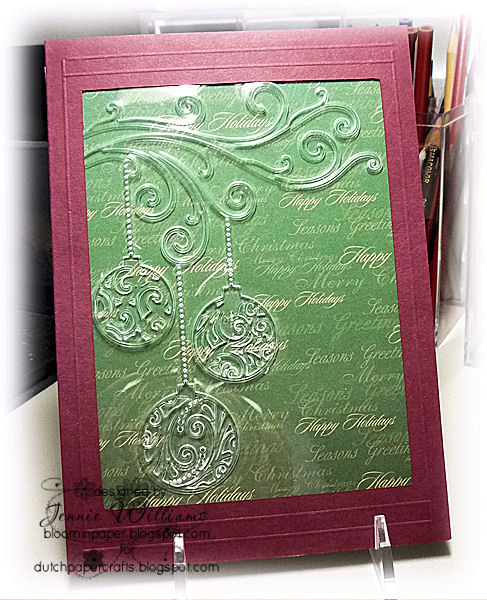
I think this Swirl Baubles folder might be my favorite. I embossed on clear cardstock which like vellum makes the embossing white. 


For the Swirl Christmas Tree I embossed on cream cardstock and highlighted the dots in the swirls with a gold leaf pen and then added a gold peel off.

If you order any of these folders from Darlene tell her I sent you!

Tuesday, September 20, 2011

Best Wishes

Day two of never been used before stuff! For this card I used another embossing folder that had never been used....and there are more!


This folder is a Quickcutz embossing folder. Behind the DP is also embossed but it left a lot of white space...even for me who loves white space! I cut a piece of DP slightly smaller than the embossed rectangle and then used a couple of Nestabilities to cut the ovals. The sentiment is from Stampin Up.

Monday, September 19, 2011

Stars but no stripes

As I have put my foot in my mouth and taken on the challenge of posting every day for the whole month I though I should get organized in what I am doing. A bit late half way through the month but better late than never!  Starting today and for the next few days I am going to be making my cards with stuff I have and have never used and believe me there is plenty. ;-)


For this card I used an embossing folder from Crafts Too that I have never used before. I also used star dies that I think I have used maybe once and the word is cut with a die from Cuttlebug that I have also never used. I think the die probably was discontinued a long time ago! To get the white dots on the stars I used cardstock from DCWV that has a white core. After cutting the shapes I put them in a Swiss Dots embossing folder and then sanded the dots so that the white core showed through.

Monday, May 16, 2011

Designer Doily

 Marianne Designs has some great dies and I just love using them to create cards as they cut and emboss at the same time. However the downside for me is that you have to use the whole  think and can't use just a part of the design like you can with the stencils. This card uses Creatables Designer Doily set LR0130. There are 2 dies in the set, the doily and the flower. The swirl is from the Frame and Swirls set LR0116.

Thursday, April 28, 2011

Bird and pansies

I found this picture in my camera and I haven't posted it yet.


 The stencil I used is a Susy border stencil. The 3dsheet is from my stash.

Tuesday, April 19, 2011

April Birthday

If your birthday is in April this card could be going to you!


I used two different stencils for this card. Marianne Designs Star Collection PD 0015 and Happy Birthday Fun HBM 7001 I  used the PD 0015 stencil just about as is but omitted the pricking and instead added the sentiment stamp. After cutting it out around the edges I mounted it on green cardstock and cut around it with scissors leaving a narrow border. After embossing and cutting the corners on the back panel I used my Martha Stewart score board to emboss a rectangle and then cut out the middle and backed it with DP. This was then adhered to the card base and the top layer was mounted with dimensional tape. The flowers are hand cut from a 3d sheet from my stash. For the butterfly I colored a piece of vellum and used a MS punch. A few half pearls and the card was done!

Thursday, April 14, 2011

Pretty in pink

I was reminded by a friend that I have not updated my blog in a while! I have hit a creative wall so I have not been making any cards. However I do have this unfinished card thatI can show you.


I CASEd this card. The unfinished part is the part that is pierced and should be embroidered but I don't have the right color threads to do it. The stencil I used is Star Collection PD 0008 that you can find HERE

Monday, March 28, 2011

More Orchids

I am really having fun with all the new 3D sheets I bought!


The stencil I used for this card is a part of the Embossing Romance EH 1842. Can you believe I even used a bow! Not something I do often as I usually do not have the right color ribbon for the project.

Friday, March 25, 2011

A challenge

The challenge this week over at Card Camp was to make a friendship card using something your friend loves. The friend I made this card for loves purple and flowers so it was an easy challenge for me.

 The stencil I  used for this card is Mattie Fall D # EH1840 that you can find HERE The image is a digi. You can download it HERE

Thursday, March 24, 2011

Pink Peony & embossing

I am still in a dry embossing mode but I am trying to do some coloring along with it instead of using 3D decoupage sheets.

I used the same Peony digi that I used the other day. The stencil I used is Open Passe-partout EH 1824. You can find it HERE or HERE The image is colored with Prismacolor pencils and Turpenoid. The little white dots you see on the flower is glitter!

Wednesday, March 23, 2011

Romantic Style

Romantic Style stencils are great value as they have two different sides. The one I used for this card you can find HERE it is EE 3425.


I first embossed the front white panel adhered it to the front of the card base and cut around two sides. I cut another white panel the same size as the front one and embossed two corners and adhered it to the inside. I used round Nesties to cut the circles and a single orchid from a 3D sheet. The pearls were colored with Copics.

Tuesday, March 22, 2011

Christmas in March

I hope I know where I put this card when Christmas comes around!


The stencil I used for this card is the same one I used yesterday but I used the whole stencil this time.The 3D sheet is another of the new ones I bought so I had to use it!

Monday, March 21, 2011

For a dear lady

On Friday I went to lunch with my oldest daughter and we met one of her work colleagues there. She had brought her 86 year old Aunt Jerry and what a delight the lady was! I made this card to give to her to let her know how nice it was to meet her and to thank her for her wonderful company during lunch.


I used this border stencil EH 1825 using half the stencil at each corner. I used a round Nestie to cut the apperture in the stencilled panel and then a smaller one to cut the pink circle. The 3D sheet is from my new stash.

Sunday, March 20, 2011

Orchids

I hope you can stand another 3d/embossed card!


 I used a part of a Happy Birthday stencil HBM 7001 for this card repeating it at each corner.  The 3d image again came from one of the new sheets I ordered. Both stencil and 3d sheet can be found at Kamya Craft Supplies. Half pearls colored with a Copic pen finishes the card off.

Saturday, March 19, 2011

Name that flower

Are these tulips? I don't know. If you have an idea of what they are please let me know! As you have probably noticed I am on an embossing/3d kick again. I bought some new 3d sheets and I am just dying to use them all they are so pretty!


I used a part of the stencil Mattie EH 1837 and the flowers from a sheet I just got. Behind the stencil I used a soft gray. With the neutral color of the flower I could have used any color but I wanted to keep it soft. I stamped the sentiment with Memento London Fog. I used dimensional silicone to raise the layers of the flowers but with the humidity here it took 2 days to dry! I prefer the silicone glue to dimensional tape but 2 days!

Wednesday, March 16, 2011

Berries

When I buy stencils I usually try to choose ones that I can use different parts in different ways. A friend bought a stencil at a show recently, one that I have but had never used, and thought that it  can only be used in the bottom corners because of the way the flowers are. You can see an example HERE
After looking more closely at the stencil I discovered there is another way to use it. For this card I just used parts of the stencil.

The blue card base and the red paper don't look like they match in the picture but in real life they do! The stencil EH 1827 I used you can find HERE

Saturday, March 12, 2011

Pansies and embossing

I have used the Pansy Row from FSS before but this time I added an extra flower as I wanted the image the same width as the border embossing stencil I used.


The flowers are colored with Prismacolor pencils and Turpenoid.

Tuesday, March 8, 2011

On a roll!

After not making any embossed cards for a while I had to make another one. It is very addicting! This is a card I made to send to a friend for Easter.

For this card I used Mattie Open Passe-partout EH 1835 The cross is a digi stamp but I don't remember where I got it. After coloring with Prismacolor pencils and Tupenoid I cut out the picture and mounted it with dimensional tape. The greeting is computer generated.

Monday, March 7, 2011

Multiple Thanks

I have been trying the newest embossing template I bought and realized that it is only usable at the bottom  of a card because of the flowers! I really do like to get as much variety as I can from my budget so this was not a good buy for me. I will have to look more carefully in the future!


After embossing and cutting out the stencil, Mattie Open Passe-partout EH1827, I used a long rectangle Nestie to cut a window in the panel. I used a $1 stamp on the DP beneath the top panel and finished off with a butterfly from Hero Arts.