Saturday, May 30, 2009

The lemonade stand award


I was given this award by dear, sweet Rita a friend I met not to long ago when I joined her Yahoo group Crafty Card Creators. Thank you Rita!

Here are the rules for this award.
  1. Comment on this blog.
  2. Cut and paste the award logo and use it on your own blog.
  3. Nominate 5 to 10 blogs you feel show great attitude and gratitude.
  4. Link to your nominees within your blog post.
  5. Comment on their blogs to let them know they received the award.
  6. Link back to the person who gave you the award to show your appreciation.
Here are the ladies that I am passing this award on to in no particular order of preference.
1. Diann
2 Christina
3 Kanan
4 June
5 Chrystal


$1 Stamp Thank You

My daughter needs quite a few Thank You cards to send to people who donate to her fundraiser for the Leukemia & Lymphoma Society. so I have to make then quick and easy and ch--- inexpensive!


I used paper from my scrap drawer and the stamps are $1 stamps from Michaels. Easy to put together and minimal coloring.

Friday, May 29, 2009

Frugal Friday

COLORING ON VELLUM

What does this have to do with Frugal Friday? What could be more frugal than a free image! There are free images all over the internet. All you have to do is save them, resize them, print them on copy paper and trace them onto vellum.
Look for stained glass patterns and clip art and of course sign up for the free samples from Dover. Here is a clipart site to get you started. On this post you can find a download for a free program to resize your images as well as a tutorial on how to do it.


I made this card with a free parchment craft pattern I got from the internet. You can get the pattern and directions HERE. Instead of using the floral image that came with the pattern I used part of a free image from Dover. As it is from a long time ago I have a download HERE I colored the image on the back with Prismacolor pencils.

The vellum paper I am using is from Pergamano but any cardstock weight vellum would be fine. You can get it at Papertrey Ink. The vellum you generally find at Michaels, Hobby Lobby etc is not heavy enough to take the embossing.

If you just want the soft look of coloring on vellum the lighter weight from the craft store will work. Print or stamp the image on regular printer paper and then trace it onto the vellum. To get the very fine line on the card above I use a mapping pen and white acrylic ink. You can get these in any art department.You can use a white gel pen but you will not get the fine line you get with a mapping pen. Of course you can use any color pen you want to do the tracing or you can trace with a white pencil, color on the back and then erase the pencil mark from the front.

For this card I traced the image onto vellum with a black Micron pen 005 which is a very fine line. Instead of coloring the petals I used a stylus to emboss the petals slightly from the back. The leaves and centers are colored with pencils on the front.

Sorry for the angle of this card but I wanted to show the gold outline. I traced the image with a gold gel pen, you can see the difference in the thickness of the line with a gel pen versus a mapping pen or fine Micron pen. I colored on the back side with colored pencils. You can color on the back or the front but coloring on the back gives a softer look. Both colored pencils and markers work well for coloring.

Have fun with coloring on vellum!

Thursday, May 28, 2009

Swaps

These are cards I made for swaps on the Crafty Card Creators list. I can post them now as the recipients have received them.
This card was for the Aged Appearance swap and went to Diann. The image is from Stampin Up colored with prismacolor pencils. What doesn't show in the picture is the irridescent green on the hummingbird. I used a wash of Twinkling H2O's scarab beetle.
This card was for the sketch challenge swap and went to Christina. The flower and sentiment are from Rubbernecker Stamps Wildflower set.
And lastly this card went to Phyllis and was for the stamped image swap. The image is actually a digi stamp from Dover. The patterned paper is from Basic Grey and I did the border with a Martha Stewart border punch.

Tuesday, May 26, 2009

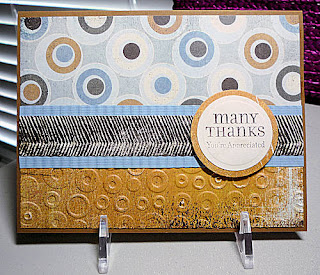
Masculine Thank You

At the request of my oldest daughter I have made two more thank you cards for men. I find it very difficult to do masculine cards. For one thing I have very few masculine stamps and my color preferences are definitely on the feminine side!


The papers on this card are from Basic Grey. I used the cuttlebug folder spots and dots on the solid paper and ran the blue strip through the paper crimper. The sentiment is from Stampin Up.


The paper on this card is from my stash, the leaf stamp is from a clear stamp set and the sentiment is from Stampin Up. The spots on the paper look pink but they are really two shades of beige.


Monday, May 25, 2009

Resizing Graphics and Pictures

I have had e-mails from some people who are having trouble with printing the graphics from Dover. The graphics as you have saved them are huge, much to big for a card so you need to be able to resize them. I use Paintshop Pro to resize my graphics and pictures. You could also use Photoshop or Photoshop Elements. If you have one of these programs you probably know how to use it to resize so you don't need my help. None of these programs are free although you can download 30 day trial versions.

........Or you could download GIMP which does basically the same thing and is FREE and not just for 30 days! (GIMP is also available for Mac but you will need to go HERE to find out about it.) GIMP has some great reviews so I downloaded it and I have written a short tutorial for how to resize using the program. You can go HERE to download the tutorial PDF file.

I hope this will help those who are having trouble with resizing.

Saturday, May 23, 2009

Dover Florals

Dover Publications had some really pretty floral clipart this week so I hope you all signed up to get their weekly free sample emails. The link is in this post.

I re-sized and printed the Dog Rose, colored it with Prismacolor pencils and odorless mineral spirits and then cut it out. I stamped the sentiment from Stampin Up with Versamark ink on vellum and heat embossed with Ranger gold embossing powder. The vellum is glued to the back of the flowers and then popped it up with pop dots. The card is 4 1/4" square.

This is the Mock Orange that I re-sized, printed and cut out by hand. It is colored with Prismacolor pencils and glued to a scalloped circle. The sentiment is a part of a $1 stamp from Michaels. I ran it through the Cuttlebug with the Swiss Dots folder, trimmed it to size and glued it to the card base. The image is popped up with pop dots.

I hope everyone has a wonderful holiday weekend.

Friday, May 22, 2009

Frugal Friday

It's Frugal Friday again and another card with a $1 stamp from Michaels. I don't know what happened to the picture but the colors are more vivid than they look in the picture.


This gift stamp is from one of the clear $1 stamp sets by Studio G. I stamped the package randomly on the background and the panel with Versamark Ink. I stamped and colored 5 package with Prismacolor pencils and odorless mineral spirits. I punched the squares with a
1 1/4" punch angling the packages slightly. The 5th package I cut out. The squares and sentiment are mounted on black and purple CS. The sentiment is from Stampin Up.

Thursday, May 21, 2009

Flourish Flower

This is a simple card but pretty I think. The half circle was stamped with itty bitty backgrounds from Stampin Up with Tattered Rose Distress Ink and I pierced around the curved edge. The flower is Flourish Flower from Hero Arts colored with Prismacolor pencils and odorless mineral spirits. I stamped the flower twice, cut out one and popped it up with pop dots. The sentiment is from Stampin Up stamped with Versamark and embossed with white embossing powder. The background is stamped with Versamark Ink with a flower image but I do not remember which stamp I used as I found the background in my scrap drawer.

Wednesday, May 20, 2009

I Like Your Style

Today I have a cute card. I don't usually do cute, as you have probably guessed by now I LOVE flowers! I do however own a few House Mouse stamps. This one is called Dragonfly-ing and I love it, especially since I got it on clearance at Hobby Lobby.


The sentiment is from Printworks Small Tag Lines. There is glitter on the wings of the dragonfly although it doesn't show up well. I did faux stitching on the panels with a white gell pen.

I have been working on a couple of cards for swaps on the crafty card creators group but I can't show them until they have been sent and received.


Monday, May 18, 2009

Pop Up Peace.......again


Ok, I think I've got it this time! This is a re-do of the card I posted yesterday but done right this time. On closer inspection of the card I saw that it had 2 slots on the bells to hook them together. When I did that then the back side showed and so did the print marks. So I redid the card this time cutting just inside the lines so that when the bells were hooked together the printing didn't show. I also finished the front of the card. I wanted it to be simple so I used Versamark ink to stamp another image from the 100 + Hampton Art Stamps and embossed it with silver embossing powder. It looks much prettier in person than it does in the picture. I am much happier with this one. LOL


Grow in your own time


I love this image! It is one of the images that came in a bundle of over 100 unmounted stamps I bought on E-Bay from Steve Hampton of Hampton Arts Stamps for around $25. Steve has bundles quite often. Just do a search for unmounted stamps and he will come up. Reasonable shipping and very fast service.
The papers are all from the Basic Grey Eva 6" x 6" pad. I colored the image with Copic markers and I colored white brads with a Copic marker to match the flower. The mats are cut with scalloped Nesties. The bottom layer and both the scalloped layers are raised with dimensional tape. The little flowers behind the brads are punches but I don't know who makes the thumb punch I used. It is a pretty old one so it may not be available anymore.
I really need to get over this pink and green and Basic Grey thing. I do have other paper! LOL

Sunday, May 17, 2009

I've Been Tagged!

By Penny Duncan. Penny has a great blog and is such a helpful person. Visit her blog HERE

I am supposed to answer all these questions and tag 8 other bloggers so I will do my best.


8 Things I Look Forward To.

1. Seeing my grand babies grow into young ladies.

2. Seeing my oldest daughter win a gold medal in the Tour De Tuscon in November.

3. Taking a trip to Vicksburg MS in November with my friend Mary to take a class.

4. My next cruise.

5. Learning to use all those Copic markers I bought.

6. Rain. We are in an 18 month drought.

7. Learning from the great ladies in my groups.

8. My 39th birthday...again!


8 Things I Did Yesterday. (I'm supposed to remember?)

1. Stayed in my jammies until noon.

2. Made tuna salad.

3. Ate ice cream for lunch.

4. Made pop up cards.

5. Sorted and stored 100+ unmounted stamps that came in the mail.

6. Took a nap.

7. Ate a tuna salad sandwich for dinner.

8. Stayed up late.


8 Things I wish I could Do.

1. See my grand babies more often. They live in California.

2. Get my youngest daughter to move back to Texas.

3. Beat Wii Ski.

4. Only buy what I go for when I go to Hobby Lobby or Michaels.

5. Hire someone to keep my stamping room clean.

6. Make my body do what I tell it to do.

7. Type without looking at the keyboard.

8. Remember what I did 5 minutes ago.


8 Things Or Shows I've Watched Lately.

1. Dancing with the stars.

2. American Idol.

3. Morning Joe.

4. 360 with Anderson Cooper.

5. The Biggest Loser

6. A movie from Netflix that I can't remember the name of.

7. San Antonio Spurs.

8.Video's on making pop up cards.


8 Great Blogs

1. Mary-Jane Downey

2. Christina Lytle

3. Rita Loyd

4. Bonnie Szwalkiewicz

5. Kimberley Jackson-Brown

6. Nancy Elrick

7. Maggi Grabowski

8. Laurie Willison


It's What's On The Inside That Counts.

.......the inside of the card that is. I have been having fun with pop up cards, doing the inside but nothing on the outside! That will come later. Yesterday I gave you a link to a site with great pop up patterns I have since found another page from the same person that isn't linked from the first page. You can find the additional patterns HERE

The pattern for this card is on the secong page. It is called Falling Stars. It was pretty easy as most of the cuts are straight but it took a long time to do.

You can see the stars better in this close-up.

This card was really easy and didn't take much time. I now have a head start on my Christmas cards!

Saturday, May 16, 2009

Cottage Door


Before I started making cards I made miniature flowers and sold then at miniature shows around the country. My business name was Cottage Door Miniatures and this was what I had on my table as my logo. The frame is 11' x 14" and the box is 2" deep. The scale is 1 inch = 1 foot. What does this have to do with Bloomin' Paper? I made my miniature flowers and most of what is in my logo is made from paper!


What is made of paper? The door and hardware, all the flowers and leaves, the basket and the steps! I am afraid it is beginning to look a little ratty from being in a suitcase and thrown around by the airlines for a few years.


I love paper, it has so many possibilities!

Scrappy Saturday

This will be the last Scrappy Saturday. I am running out of ideas! In the future I will put scrappy cards in Frugal Friday after all it is very frugal to use scraps! These scraps from Basic Grey 'Sugared' are just as they came out of my scrap draw. I matted the bottom panel in burgandy and the other two in green. I punched the little flowers from the same green and added a couple of rivets that came as a free gift in an order. I don't remember from where. The sentiment is from Stampin Up.

Friday, May 15, 2009

Frugal Friday


Another $1 stamp from Michaels! I used a Nestie circle to trace around for the curve on the bottom of the card. The DP is from a 5" x 7" 32 piece paper stack 'modern milan' by Me & My Big Ideas that was on clearance for $3 somewhere, either Hobby Lobby or Michaels. I used Nestie circles and a scalloped circle for the sentiment mats and mounted them with dimensional tape.

Thursday, May 14, 2009

Pop Up Fan

Woo hoo look what I found! Patterns for fantastic pop up cards. You can find the patterns HERE
You can see some more of the artist's fabulous work HERE and read about the materials and tools needed.


This is inside of the card I made. I didn't do anything to the outside.I can already see mistakes. I didn't make sure that the fold was centered and there are a few little bits I didn't cut out but this was only practice so I am quite pleased with it.


This is the side view. It is quite easy really but I do need some practice with my swivel knife.

Going Dotty


Just a little something I made using chipboard coasters that I found in Michaels $1 bin. They had square ones and round ones with wine motifs on them. This little pencil/tool holder takes 7 coasters but if you leave out the dividers you will only need 5. I colored the edges of the coasters with a black Sharpie and then covered the coasters with DP. I punched holes for the ribbon with a regular round hole punch. For the divider I cut a slit half way up and the width of the coaster on 2 coasters and slotted them together. The sides are glued to the outside of the bottom. The image is from Whipper Snapper Designs Blossoms and Butterflies colored with Prismacolor pencils.

A word about glue from one who has tried every glue known to man! Another of my hobbies is making scale miniatures. In this hobby one uses all types of materials, wood, paper, metal, fabric, glass. I had a glue for each different material but then I discovered The Ultimate glue from Crafter's Pick. It will glue anything to anything and it dries clear. Only one glue bottle what could be better! It should be available in all the craft stores. It is what I use to glue on my bows and buttons etc.